StaticCell && PrototypeCell
这仍然是一篇关于
storyboard的笔记; 在我的项目中TableView使用的还是比较频繁,之前我对于自定义cell,一般都是新建一个xib,或者新建一个customCell类来解决;最近才发现,storyboard里面,可以直接自定义cell,很方便。同时提供两种类型cell,static,prototype; 下面是我关于这两种cell的简单笔记
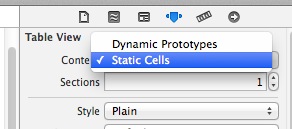
1. Static Cell
static cell, 顾名思义,就是静态cell,直接在storyboard中设置好,然后直接加载;无需再设置reuse identifier进行reuse; 当然,你可以在每一个static cell中,按照你的需要,自定义contentView;
PS1: 我这里尝试过给
static cell添加reuse identifier,然后进行reuse,结果报错了;PS2: 我尝试在
UIViewController中使用static cell,结果发现,static cell只能在UITableViewController中使用;
2. Prototype Cell
prototype cell,顾名思义,就是原型cell,这个cell作为一个原型,肯定可以进行reuse,当然也支持在storyboard中直接自定义contentView;
PS: prototype cell在UITableViewController和其他VC中都可以使用,没有static cell的限制;
废话少说,我们来个基本的例子,来帮助理解;
首先,我们的例子app大概是这个样子;

主要结构很简单,一个基于导航栏的VC,上面3个按钮,分别push到VC1, VC2,VC3
- VC1 – 基于UITableViewController的static cell
- VC2 – 基于UITableViewController的prototype cell
- VC3 – 基于UIViewController的prototype cell
1.VC1 – 基于UITableViewController的static cell
我们先添加一个UItableViewController,然后选择static cell
这里可以尝试尽量自定义设置属性; 比如,选中section部分,设置section header, footer, rows
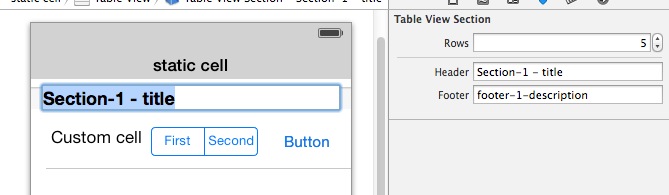
- 选择一个cell,进行一些简单的自定义(注意,这里每一个cell是互不影响,你可以单独设置每一个cell的具体属性)
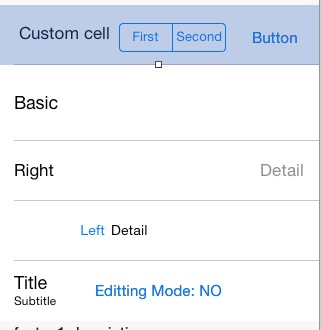
好了,VC1基本上就算完成了,你可以直接运行加载,你会发现,和我们预期的一样;
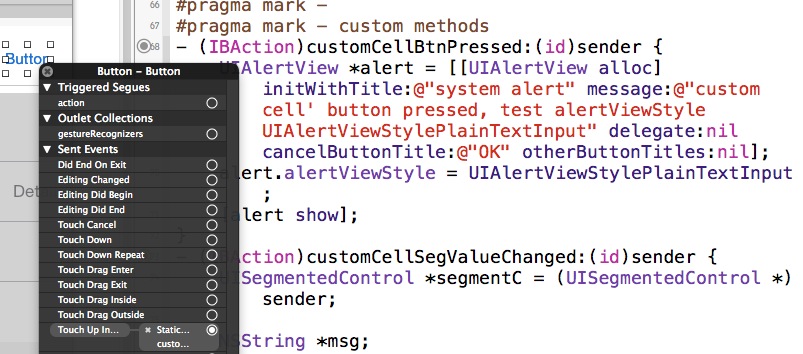
PS1:如果我想让这个static cell上面的自定义按钮响应事件,或者支持编辑模式,怎么处理? 其实这个和以前的处理方式一样:直接在对应的VC.m文件里,写上支持编辑模式的相关方法即可。 至于响应点击时间,我们直接通过IBOutlet关联事件方法就可以了。
比如,我这里,对第一行cell的button关联了一个方法
PS2: static cell仍然是可以自定义headerView和footerView的
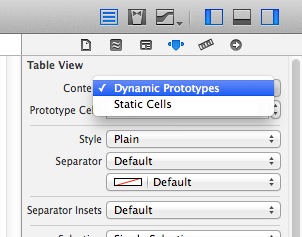
2. VC2 – 基于UITableViewController的prototype cell
我们先添加一个UItableViewController,然后选择prototype cell
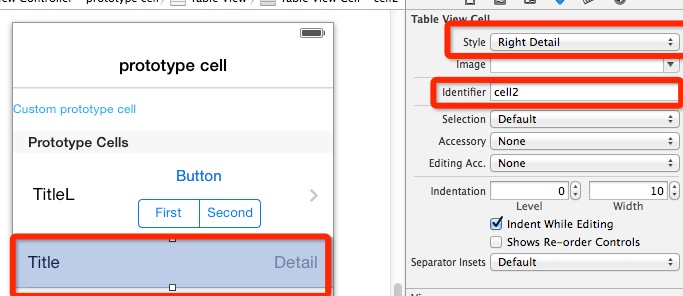
你会发现,你tableView上面cell,显示为prototype cells; 这里cell的数量,可以根据你的实际需要,进行添加或者减少;当然,每一行cell仍然可以完全自定义contentView; (我这里自定义了2个不同的cell,同时,需要分别设置不同的
reuse identifier)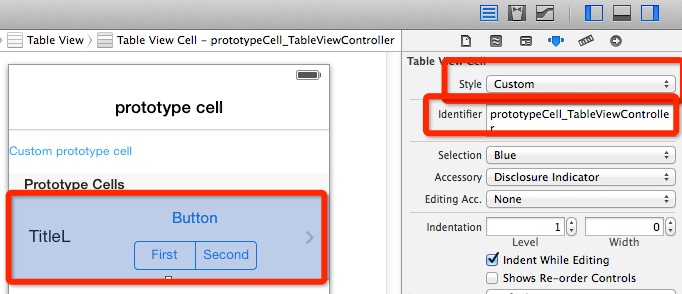
然后,在对应的.m文件中,直接根据cell的reuse identifier即可;
1 2 3 4 5 6 7 8 9 10 11 12 13 14 15 16 17 18 19 20 21 22 23 24 25 26 27 28 29 | |
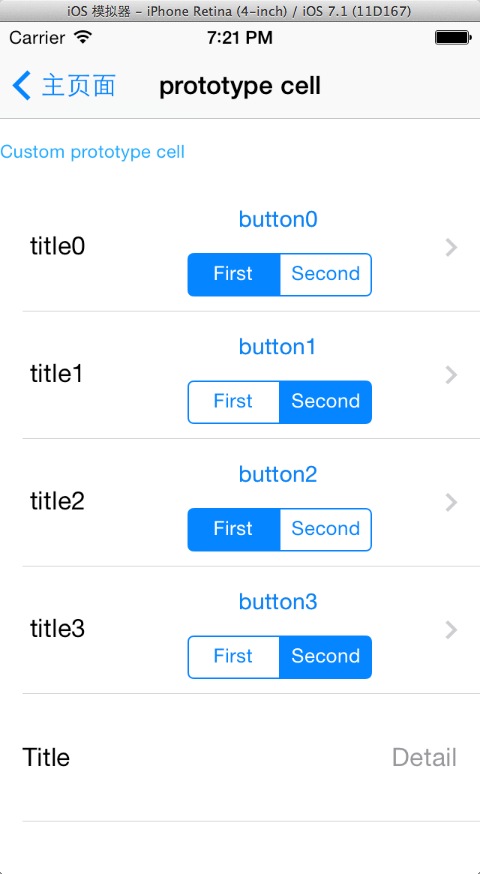
然后运行,大概就是这个样子:
3. VC3 – 基于UIViewController的prototype cell
- 基本和VC2类似,只是UITableViewController换成了UIViewController;
- 注意,这里tableview和navgationBarItem的所处层级不一样,这个注意一下;
基本笔记就是这些了。以后有了再慢慢更新。